
What changed with 2026 hardware
Printer issues aren’t exactly new. People have been wrestling with paper jams and faded prints for decades. But the nature of those problems is changing. We’re seeing a shift driven by increasingly "smart’ printers, a greater reliance on wireless connectivity, and the constant push of firmware updates. It"s not enough to know the old tricks anymore; you need to understand how these modern features introduce new points of failure.
All-in-one devices are packed with sensors that fail more often than the mechanical parts of the past. Wireless connectivity adds security vulnerabilities and connection drops that didn't exist when we used physical cables. Firmware updates are supposed to fix bugs, but I've seen them brick machines entirely during routine installations.
Unfortunately, global supply chain issues continue to linger, impacting the availability of replacement parts. What used to be a quick and easy fix – ordering a new fuser or print head – can now involve weeks-long delays. This means preventative maintenance and proactive troubleshooting are more important than ever. We’ll focus on solutions tailored to the printers people are actually using today, and anticipate encountering in 2026.
This guide isn’t just a rehash of the usual "turn it off and on again’ advice. We"ll cover the specific challenges presented by modern printers, from interpreting cryptic error codes to dealing with software conflicts. I think a lot of the existing advice online is outdated and doesn't reflect the reality of printing in 2026.
Paper jams and sensor failures
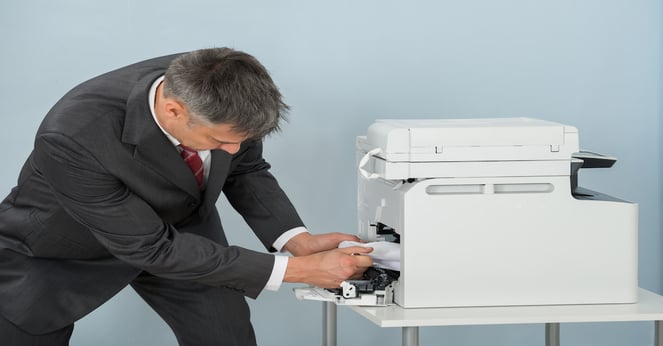
Yes, sadly, paper jams are still a remarkably common problem. Despite advancements in printer technology, paper continues to find inventive ways to get stuck. The fundamental causes—torn paper, incorrect paper type, or a stray foreign object—remain prevalent. However, we're also seeing a rise in jams caused by sensor malfunctions and issues within the automatic document feeder (ADF), especially in office environments.
A lot of ADF jams aren’t caused by the paper itself, but by rollers that are worn or dirty. These rollers need to grip the paper firmly to feed it through, and when they lose that grip, the paper buckles and jams. Similarly, optical sensors that detect the presence of paper can become misaligned or covered in dust, leading to false readings and jams.
Follow the screen instructions, but don't force the paper. Fusers get hot enough to burn you, so watch where you put your hands. I use a flashlight to find the tiny scraps that stay behind; if you leave even a sliver of paper in the path, the sensor will keep reporting a jam.
Preventative measures are key. Store paper in a cool, dry place to prevent it from becoming damp or curled. Use the paper weight and type recommended by the printer manufacturer. Regularly clean the printer's rollers and ADF to ensure they are free of dust and debris. I've found that a simple lint-free cloth dampened with distilled water is usually sufficient.
- Turn off and unplug the printer.
- Open all access doors and trays.
- Gently remove any visible jammed paper.
- Inspect the paper path for any remaining scraps.
- Close all doors and trays securely.
- Plug in and turn on the printer.
Wireless and network drops
Wireless printing is incredibly convenient, but it's also a frequent source of frustration. The most common complaints I hear revolve around the printer not showing up on the network, intermittent connection drops, and painfully slow printing speeds over Wi-Fi. It’s a bit of a perfect storm; printers have complex networking requirements, and home and small business networks aren't always up to the task.
Troubleshooting often starts with the router. Ensure your router's firmware is up-to-date and that it’s broadcasting a strong Wi-Fi signal. Check for interference from other devices, such as microwaves or cordless phones. Sometimes, simply restarting the router can resolve the issue. Also, make sure the printer is within range of the router and isn't obstructed by walls or other objects.
Updating the printer’s firmware is also critical. Manufacturers regularly release updates that address connectivity issues and improve performance. You can usually find these updates on the printer manufacturer's website. However, be careful during the update process – a power outage or interruption could brick the printer. I’ve seen that happen more than once.
One particularly annoying issue is printers "forgetting" their network settings. This often happens after a power outage or a router change. You may need to reconfigure the printer's wireless connection from scratch, which can be time-consuming. A static IP address assigned to the printer can sometimes prevent this from happening, but it requires some technical know-how.
- Check the printer's Wi-Fi signal strength.
- Restart the printer and router.
- Update the printer's firmware.
- Ensure the printer is within range of the router.
- Assign a static IP to the printer through your router settings to stop it from 'disappearing' after power cycles.
Driver conflicts and software bugs
Drivers are the bridge between your OS and the hardware. When an OS updates, these bridges often break. If your printer stops responding after a Windows or macOS update, the driver is the first thing I check. Corrupted or generic files are usually the culprit.
Properly installing and updating drivers is crucial. Avoid downloading drivers from unofficial sources, as they may contain malware. Always download drivers directly from the printer manufacturer's website. Windows often attempts to install generic drivers, but these may not offer full functionality or optimal performance. Using the manufacturer’s driver is almost always the best approach.
Software conflicts can also cause driver-related problems. Sometimes, another program interferes with the printer driver, leading to errors or crashes. Try closing unnecessary programs and restarting the computer. In some cases, you may need to uninstall and reinstall the printer driver to resolve the conflict.
The increasing trend of 'universal' drivers is a mixed bag. While they can simplify driver management, they often lack the specific features and optimizations of dedicated drivers. They’re fine for basic printing, but if you need advanced features like color calibration or duplex printing, you’ll likely need a dedicated driver. I’ve found the universal drivers often lack the robustness of the specific ones.
- Download drivers from the manufacturer's website.
- Uninstall and reinstall the printer driver.
- Check for software conflicts.
- Run the Windows Printer Troubleshooter.
- Update your operating system.
Streaks, blurs, and fading
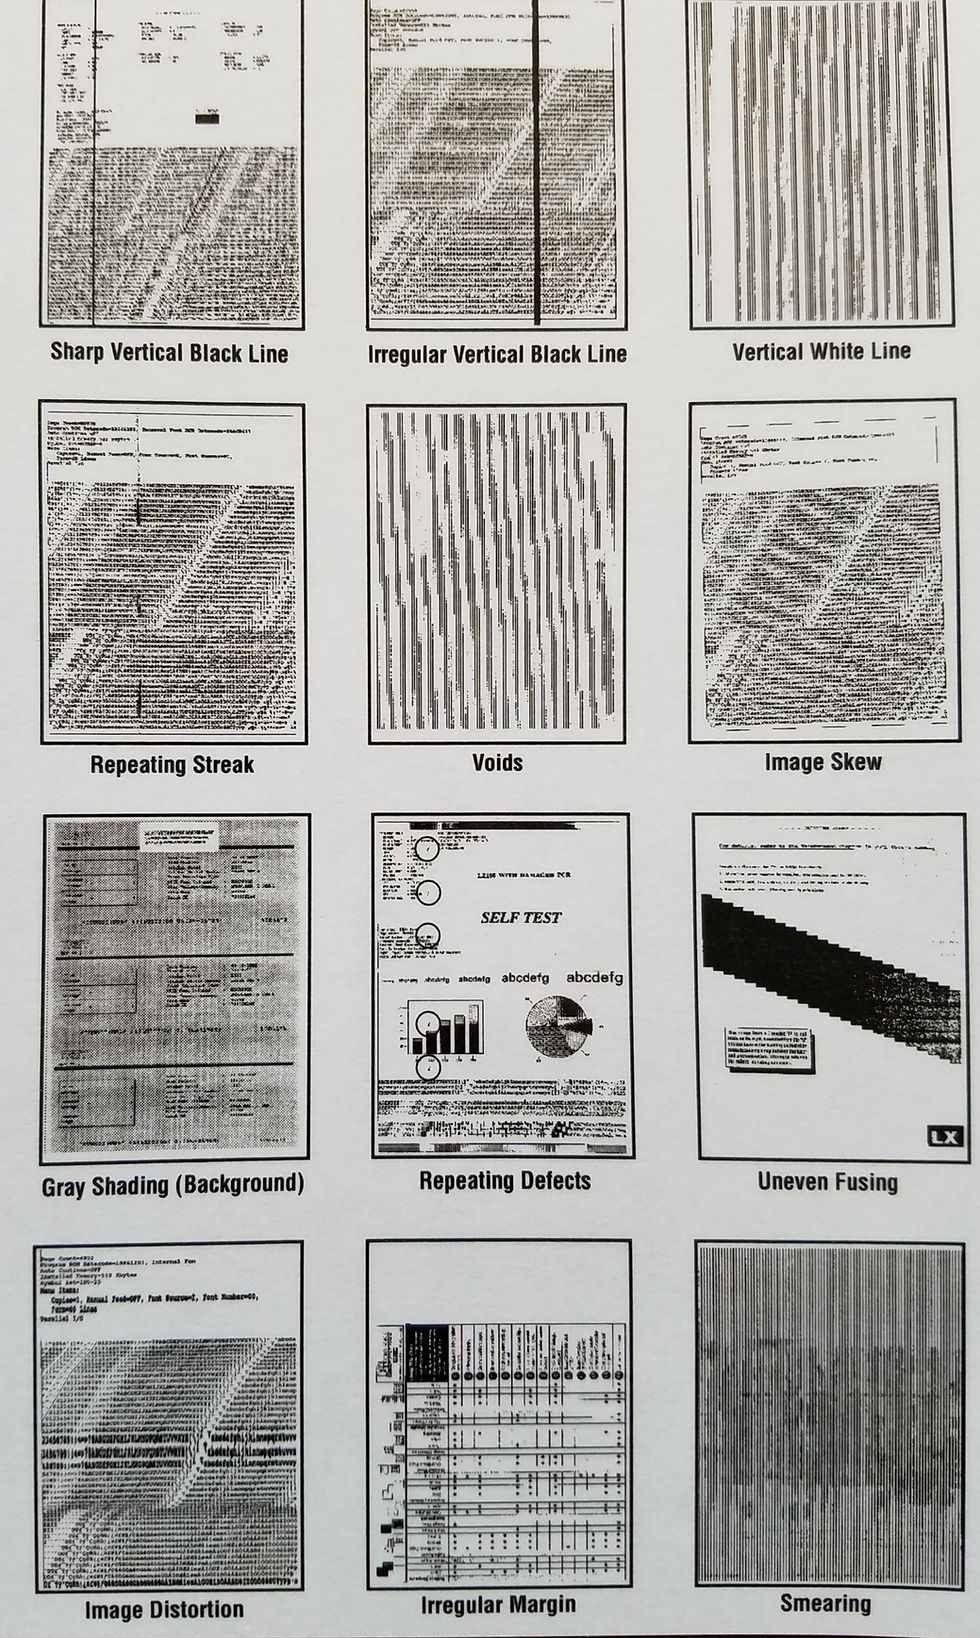
Poor print quality is a frustrating problem, and often a sign of a deeper issue. The most common complaints are streaks, blurs, and fading. These can be caused by a variety of factors, ranging from low toner or ink to clogged print heads and incorrect print settings. Diagnosing the specific cause is key to fixing the problem.
Low toner or ink is the simplest explanation. Replace the cartridge and see if the problem resolves. If you’re using a third-party cartridge, it might be the source of the issue – the quality can vary significantly. Clogged print heads are a common problem with inkjet printers. Running the printer’s built-in cleaning cycle can often clear the clogs, but it may need to be repeated several times.
Incorrect print settings can also affect print quality. Make sure you’ve selected the correct paper type and print quality settings. For laser printers, check the density settings. For inkjet printers, check the color calibration settings. Paper quality also plays a role; using the wrong type of paper can lead to smudging or bleeding.
There are some key differences between laser and inkjet printers when it comes to print quality issues. Streaks in a laser printer often indicate a problem with the drum or toner cartridge. Fading in an inkjet printer is often caused by clogged print heads or low ink. It's important to understand these differences to properly diagnose and fix the problem.
Common Print Quality Issues, Causes, and Solutions (2026)
| Print Quality Issue | Likely Causes | Suggested Solutions |
|---|---|---|
| Streaks or Lines | Low toner or ink, damaged drum unit, dirty printhead | Replace toner/ink cartridge. Clean or replace the drum unit (if applicable). Gently clean the printhead following manufacturer instructions. |
| Smudging | Incorrect paper type, too much ink/toner, slow print speed | Use paper recommended for your printer type (laser or inkjet). Adjust print density settings. Ensure the printer isn't set to a very slow print speed. |
| Fading or Light Print | Low toner/ink, incorrect print settings, aged toner/ink | Replace toner/ink cartridge. Check print density settings and increase if necessary. Use fresh toner/ink cartridges. |
| Dark or Blotchy Print | Excessive toner/ink, incorrect print settings, high humidity | Adjust print density settings and decrease. Ensure correct paper type is being used. Store toner/ink in a cool, dry place. |
| Blurred Text or Images | Incorrect paper type, low resolution image, misaligned printheads | Use appropriate paper type. Increase image resolution before printing. Run printhead alignment utility (often found in printer software). |
| White Spots or Missing Sections | Clogged nozzles (inkjet), faulty toner cartridge (laser), damaged fuser (laser) | Run printhead cleaning cycle (inkjet). Replace toner cartridge (laser). If problem persists with laser printer, professional repair may be needed to address the fuser. |
| Ghosting (faint shadows) | Improper toner adhesion, drum contamination, incorrect paper | Clean the drum unit. Ensure the paper is compatible with laser printing. Try a different brand of toner. |
Illustrative comparison based on the article research brief. Verify current pricing, limits, and product details in the official docs before relying on it.
Decoding error codes
Printer error codes can feel like a foreign language. They’re often cryptic and unhelpful, leaving you wondering what exactly is going wrong. However, they are valuable starting points for diagnosis. Each error code corresponds to a specific problem, and understanding the code can save you a lot of time and effort. The key is knowing where to look for the meaning of the code.
Different printer brands use different error codes. Here are a few common examples: HP printers often use codes starting with 'C' (e.g., C1100 indicates a paper jam). Epson printers use codes like '0x97' (often related to print head issues). Brother printers might display codes like '46' (indicating a scanner error). Canon printers have their own unique set of codes.
Error codes are just starting points. A 'paper jam' code might actually mean a sensor is dirty or a spring has snapped. Don't take the screen's word for it—inspect the physical path before buying replacement parts.
The best resource for decoding error codes is the printer manufacturer's website. Most manufacturers provide detailed explanations of their error codes in their support documentation. You can also search online forums and communities for help. I've often found that other users have encountered the same error code and have shared their solutions.
- Consult the printer's manual.
- Search the manufacturer's website.
- Search the Reddit r/printers community or specific manufacturer forums for the code.
- Contact the manufacturer's support team.
Common Printer Errors
- HP Error 0x00000709 - This generally indicates a problem with the printer's firmware or a corrupted file system. Often resolved with a firmware update or, in severe cases, a factory reset.
- Epson Error C1E56-1603 - Commonly seen in Epson EcoTank printers, this error relates to issues with the print head or ink supply system. Cleaning the print head is a common first step.
- Brother Error 46 - This error code on Brother printers usually signifies a communication problem between the printer and the computer. Checking the USB or network connection is crucial.
- Canon Error B200 - Indicates a paper jam or a problem with the paper feed mechanism. Thoroughly inspect the paper path for obstructions.
- Lexmark Error 03.03.06 - Often related to a fuser error, meaning the printer isn't heating up correctly to bond toner to the paper. This may require professional repair.
- Kyocera Error 033-416 - This error usually points to a problem with the laser unit or high voltage power supply within the printer.
- Dell Printer Error 1601 - Typically indicates a communication issue or a problem with the printer driver on a Dell printer. Reinstalling the driver is a common solution.

No comments yet. Be the first to share your thoughts!